Tested on OpenBSD 6.8
NOTE (2023-07-22): the APU platform is end-of-life. In addition, this article is probably due for a rewrite. Many of the principles still apply on a broad level, but tread with caution.
It’s no secret that consumer routers have security problems (600 CVEs between 1999 and 2017, and those were only the disclosed vulnerabilities) as a result of poorly engineered software. The paper “So You Think Your Router Is Safe?” addresses this subject well.
Confronted with this reality, as someone who’s been bitten by the OpenBSD bug (or pufferfish, same difference), the solution that came to mind was to build my own router. So I did, and what follows is how I did it.
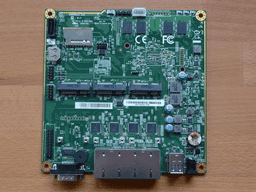
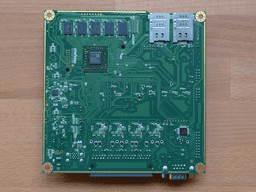
To purchase an APU4D4 or similar, visit PC Engines. Their boards come with coreboot preinstalled and so far it’s been a great experience.


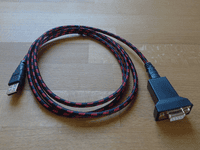
Include a USB to DB9F serial adapter in the purchase, as it’s needed for the installation.

Consult the manual for assembly instructions.
Download, verify, and flash the amd64 image that includes the file sets
(installXX.img) to a USB drive. OpenBSD’s FAQ covers
this.
Connect to the serial port. I run OpenBSD on my laptop, so I use
cu(1) for serial connections. Note that
the user must be part of the dialer group to use
cua(4) devices, so I’ll briefly outline
how to make sure that’s the case.
Display the current user and groups they belong to with
id(1).
$ id
Add the user to the dialer group if necessary with
usermod(8).
# usermod -G dialer [user]
Finally, connect to the serial port. This indicates the line to use
(-l) and the baud rate (-s). The APU4D4 requires a baud rate of
115200.
$ cu -l cuaU0 -s 115200
Please remember to enter this at the boot prompt afterward, to configure the serial connection. Later on, the installer will set these.
boot> stty com0 115200
boot> set tty com0
boot> boot
From here, the FAQ provides enough information to get through the rest of the installation procedure. Be sure to look at the documentation for the relevant architecture. In this case, that means to consult the notes on amd64.
Do the usual (in other words, read
afterboot(8), check system mail,
and so on). After that, there’s a couple of things that must be
implemented.
pppoe(4).Some other things that can be added:
veb(4) with good results.unbound(8), see
Creating a DNS sinkhole with Perl and
unbound(8).home.arpa, see Local authoritative DNS on OpenBSD using
dhcpd(8) and unbound(8).As always, give official OpenBSD documentation preferential treatment and cross-reference it when using unofficial documentation. Keep it simple and if what a knob changes is unclear, don’t change it.